How to Make a Sofa Look New Again Without Replacing It?
How to Make a Sofa Look New Again Without Replacing It?
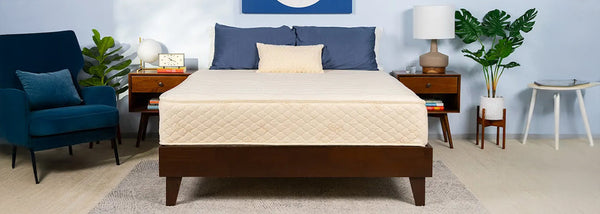
A well-loved sofa often becomes the centerpiece of a living space, bearing witness to countless memories while gradually losing its aesthetic appeal. Rather than replacing it entirely.
Revitalizing an existing sofa set through strategic cleaning, fabric refreshment, and thoughtful upgrades offers a cost-effective and sustainable solution. With advancements in upholstery technology and modular design, transforming an aging sofa into a rejuvenated focal point is more achievable than ever.
This guide explores practical methods to breathe new life into furniture, emphasizing innovative approaches that align with modern lifestyles and durability expectations.
Rearranging and Styling Your Living Space for a Refreshed Sofa
Reviving your sofa set can be approached in two effective ways:
- One focuses on cleaning and DIY repairs to restore the sofa itself.
- The other involves making thoughtful changes to your living environment-like rearranging furniture and updating décor-to give your space and sofa a completely refreshed feel.
That is to say, giving your sofa a new lease on life isn’t just about cleaning or updating its fabric-it’s also about how you present it within your living space. Rearranging your living room sofa and updating the surrounding décor can dramatically enhance the impact of your sofa fabric refresh.
Changing the Sofa’s Position
Moving your sofa to a different spot in the living room can instantly change the flow and feel of your living area.
- Try placing it near a window to take advantage of natural light, or angle it to create a cozy conversation nook.
- Shifting the sofa away from high-traffic areas can also help reduce wear and tear, prolonging the results of your DIY sofa cleaning and fabric updates.
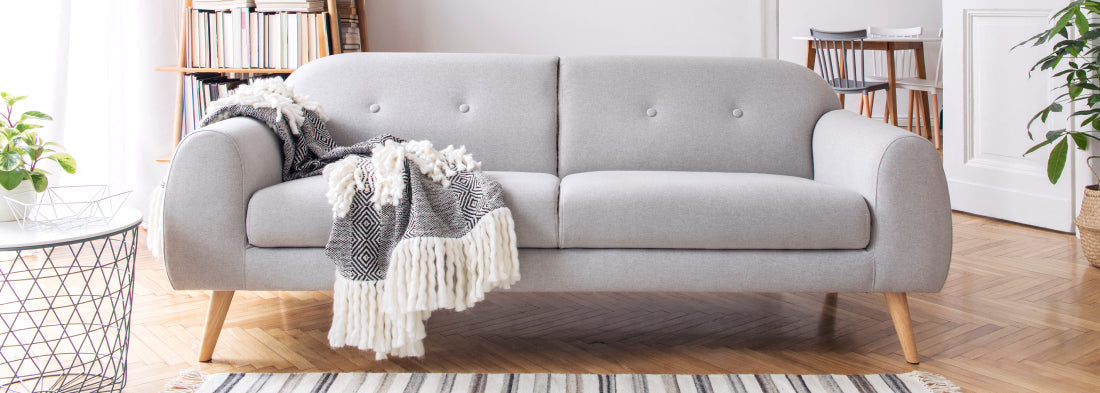
Updating Surrounding Décor
- Pair your revitalized sofa with new or rearranged accessories.
- Add a stylish rug underneath, hang fresh artwork above, or introduce a coffee table with a new centerpiece.
- Coordinate throw pillows and blankets with your sofa slipcovers or cushions for old sofa.
All of these can tie the whole look together, making the space feel thoughtfully designed and inviting.
Lighting and Ambience
Don’t underestimate the power of lighting.
Floor lamps, table lamps, or even string lights can highlight your refreshed sofa and create a warm, welcoming atmosphere. Consider using adjustable lighting to set different moods throughout the day, showcasing your sofa’s new look at its best.
By thoughtfully rearranging your living space and updating the décor around your sofa, you can maximize the impact of your sofa fabric refresh and make your entire living room feel brand new-without any major renovations or replacements.
DIY Sofa Cleaning: Foundation of Sofa Fabric Refresh
The journey to revitalizing a sofa always begins with a thorough cleaning-a crucial step that removes years of accumulated dust, stains, and odors. This initial process not only instantly improves how your sofa looks and feels, but also sets the stage for any further updates or decorative changes you might want to make.
Regular maintenance not only enhances appearance but also extends the sofa’s lifespan by preventing fabric degradation.
Routine Maintenance Protocols
Weekly vacuuming with upholstery attachments eliminates surface debris from crevices and cushion seams. For spills, immediate blotting-never rubbing-prevents liquid penetration. Microfiber cloths dampened with lukewarm water gently lift fresh stains without spreading discoloration. When you make cleaning a habit, you’re investing in the long-term health and comfort of your living space.
These practices form the baseline of sofa fabric refresh strategies, preserving structural integrity between deep-cleaning sessions:
- Weekly vacuuming: Use upholstery attachments to reach into crevices, seams, and under cushions, pulling out crumbs, pet hair, and dust that can wear down fibers over time.
- Immediate spill response: If something spills, blot the area right away with a clean, dry cloth-never rub, as this can push the stain deeper into the fabric.
- Gentle spot cleaning: For fresh stains, lightly dampen a microfiber cloth with lukewarm water and gently dab the area. This lifts the stain without spreading it or damaging the fabric.
DIY Sofa Cleaning: Foundation of Sofa Fabric Refresh
The journey to revitalizing a sofa begins with thorough cleaning, a process that removes years of accumulated dust, stains, and odors. Regular maintenance not only enhances appearance but also extends the sofa’s lifespan by preventing fabric degradation.
Sofa Fabric Refresh: Structural and Aesthetic Renewal
Beyond surface cleaning, fabric refresh techniques address wear patterns, color fading, and material fatigue. These methods combine scientific approaches with design innovation to achieve transformative results.
General Tips for Reviving Your Sofa
Assessing Condition and Planning
Before you begin, take a few minutes to carefully inspect your sofa’s frame, springs, and fabric. Look for the following:
- Surface dirt or dust: Check armrests, seat cushions, and crevices for visible buildup.
- Discoloration or fading: Identify any areas where the fabric looks lighter, dull, or uneven in color.
- Flattened or misshapen cushions: Press on the cushions to spot sagging or loss of shape.
- Weak spots in fabric or stitching: Examine seams, corners, and high-use areas for fraying or loose threads.
Documenting these issues gives a clear starting point, helping to prioritize whether your sofa needs a focused cleaning routine, targeted repairs, or decorative updates for a complete sofa fabric refresh.
DIY Sofa Cleaning Methods
Reviving the fabric and structure of your sofa begins with a thorough, step-by-step cleaning routine. A meticulous DIY sofa cleaning not only removes dirt and stains, but also rejuvenates fibers for a lasting sofa fabric refresh. We break down the process into detailed phases below.
Pre‑Cleaning Preparation
Before any liquid touches your sofa, we recommend:
- Identify fabric type and cleaning code: Check manufacturer tags for codes (W, S, WS, X) to determine safe cleaning methods.
- Gather supplies:
- Vacuum with upholstery attachment
- Soft-bristled brush
- Microfiber cloths
- Mild detergent or upholstery shampoo
- Baking soda, white vinegar, club soda
- Spray bottles
- Steam cleaner (optional)
- Test a hidden area: Apply your chosen solution to an inconspicuous spot; wait 15 minutes to ensure no discoloration or damage.
Precision Vacuuming
Before applying any liquid cleaner or spot treatment, removing loose dirt and debris is essential. This prevents grime from being rubbed deeper into the fabric during cleaning.
How to Do It:
- Remove all loose cushions and place them aside.
- Use the crevice tool to vacuum deep between the seat cushions and along the seams. These areas trap crumbs, dust, pet hair, and lint.
The first line of defense:
- Remove loose debris: Take off cushions and vacuum the frame, under-seat crevices, and seams.
- Use crevice tool: Target dust and crumbs hiding in stitching and folds.
- Brush attachment: Gently lift pet hair and surface dust without abrading fibers.
Quick Tip: Regular vacuuming (at least once every two weeks) supports ongoing DIY sofa cleaning and prevents buildup that dulls fabric.
Dry Cleaning with Powders
Mix mild detergent and lukewarm water. Dab stains with a microfiber cloth. Avoid scrubbing to prevent fabric damage. Addressing stains promptly helps prevent permanent discoloration or odors. Spot treating lets you focus on problem areas without needing to wash the entire sofa.
Steam cleaning is ideal for lifting embedded dirt, grease, allergens, and odors that vacuuming or spot treatment can’t reach. However, it should only be used if your sofa fabric is water or solvent safe, use a home steam cleaner for a deep lift of dirt and odors. Allow fabric to air dry fully.
For water‑sensitive fabrics:
- Apply dry-clean powder or cornstarch: Sprinkle liberally over the surface.
- Work it gently: Use a soft brush to massage powder into fibers, breaking down oils and stains.
- Let sit: Leave for 20–30 minutes to absorb grime.
- Vacuum thoroughly: Remove all residue, then inspect.
This dry approach ensures a safe sofa fabric refresh without over‑wetting.
Wet Cleaning and Shampooing
When fabric permits solvents:
- Mix upholstery shampoo: Follow label directions, creating a gentle foam.
- Spot-apply foam: Work in circular motions with a soft brush, focusing on stains first.
- Wipe off: Use a damp microfiber cloth to lift foam and dissolved dirt.
- Rinse: Lightly mist with water to remove detergent traces, then blot dry.
DIY sofa cleaning note: Avoid soaking; over‑wetting can lead to mold and weakening of adhesives.
Tip- apply a fabric freshener spray after cleaning to neutralize lingering odors.
Homemade Cleaning Solutions
Vinegar & Baking Soda Paste
- Mix equal parts white vinegar and water; stir in baking soda to form a paste.
- Apply to grease or food stains; let foam for 10 minutes.
- Blot and vacuum residue.
Club Soda for Wine and Ink
- Pour a small amount onto the stain; blot immediately with a clean cloth.
- Repeat until the stain lifts, then air‑dry.
Enzyme Cleaner for Pet Stains
- Spray enzyme solution; let sit per instructions (often 10–15 minutes).
- Blot away moisture; vacuum once dry.
Steam Cleaning Technique
For a deeper DIY sofa cleaning:
- Fill with water only,no detergents.
- Work in sections: Glide steam head slowly, overlapping passes.
- Keep distance: Hold nozzle 1–2 inches above fabric to avoid over‑saturation.
- Dry: Open windows or use fans; remove cushions to dry separately.
Safety Tip: Always check that fabric code W or WS allows steam cleaning to prevent damage.
Odor Elimination Strategies
Baking soda layer: Sprinkle over the sofa, let sit overnight, then vacuum.
Activated charcoal pouches: Place under cushions for 48 hours to absorb smells. Final Touch – Deodorize and Refresh, after deep cleaning, it’s helpful to neutralize odors and add a fresh, inviting scent.
DIY Fabric Freshener Spray:
Mix in a spray bottle:
- 1 cup water
- 1-2 tbsp rubbing alcohol (helps disperse oils and dries fast)
- 10-15 drops of essential oil (lavender, eucalyptus, or lemon are great choices)
Make sure there is plenty of ventilation, open windows or use a fan to help speed up drying and freshening.
Frame and Support Check
- Begin by tightening any loose bolts, screws, or fasteners on your sofa’s frame to ensure overall stability.
- Next, gently press down at multiple points along the seat and back to test the springs for even support.
- If you notice any sagging or unevenness, take action by reinforcing the base with webbing straps stretched tightly under the seat.
- For additional support, insert a piece of sturdy plywood between the frame and the cushions to create a firmer seating surface.
Addressing these structural issues first ensures that all aesthetic upgrades-like new cushions or slipcovers-will have a strong, supportive foundation, maximizing their effectiveness and comfort.
Final Rinse and Drying
- After cleaning, it’s important to dry your sofa thoroughly to prevent moisture-related problems. Increase airflow by positioning your sofa near an open window or placing a fan nearby to speed up the drying process.
- If the weather allows, let indirect sunlight reach the sofa for natural UV-assisted sanitization, which helps eliminate lingering bacteria and odors.
- Stand the cushions on their ends so that air can circulate around all sides, ensuring even drying and reducing the risk of mold or musty smells.
Post‑Cleaning Restoration
- Once your sofa is dry, fluff and rotate the cushions to restore their original shape and distribute wear evenly.
- For any areas that still feel saggy or flat, consider replacing the old inserts with high-resilience foam to provide renewed support and comfort. Finally, apply a light mist of a commercial fabric protector over the upholstery.
This extra layer boosts stain resistance and helps maintain the results of your sofa fabric refresh for a longer period, keeping your sofa looking and feeling fresh.
Full Sequence of Steps for a Sofa Fabric Refresh
- Remove all cushions and covers from the sofa.
- Vacuum the entire frame and cushions to remove dust and debris.
- Spot clean any visible stains using a mild detergent and a soft cloth.
- Brush the fabric gently to lift the pile and restore texture.
- Apply a fabric-safe deodorizer or sprinkle baking soda, let sit, then vacuum.
- Wash removable covers in the machine if possible, or use a steam cleaner.
- Replace covers and cushions once completely dry for a fresh, revitalized look.
Professional-Grade Home Solutions
Deep Penetration Cleaning: Professional cleaners use industrial-grade steam cleaning equipment that penetrates deep into the sofa’s fabric layers, effectively removing embedded dirt, dust mites, and allergens that regular DIY sofa cleaning may not reach. This is especially beneficial for households with allergy concerns or pets.
Stain and Odor Removal: Persistent stains and lingering odors often require more than home remedies. Professionals use specialized cleaning agents and targeted treatments for tough spots, ensuring a thorough sofa fabric refresh without damaging the upholstery.
Sanitization and Allergen Control: Beyond visible cleanliness, professional services often include sanitization processes that eliminate bacteria, mold spores, and allergens, contributing to a healthier indoor environment and extending the life of your sofa.
Convenience and Peace of Mind: Hiring professionals saves time and effort, ensuring that your sofa receives comprehensive care. Their expertise guarantees that even the most deep-seated contaminants are addressed, leaving your furniture looking and feeling renewed.
Frequently Asked Questions
Q1. How often should I perform DIY sofa cleaning?
A consistent cleaning routine is essential for keeping your sofa looking its best. Monthly vacuuming helps remove dust, debris, and allergens from the surface and crevices, preventing buildup that can dull the fabric’s appearance.
In addition, performing a more thorough deep clean every three months-such as spot-treating stains, washing removable covers, and using a fabric-safe deodorizer-ensures a comprehensive sofa fabric refresh.
This regular maintenance not only preserves the color and texture of your upholstery but also extends the overall lifespan of your sofa, keeping it fresh and inviting for years.
Q2. Can slipcovers fit any sofa shape?
While many stretch-knit slipcovers are designed to flexibly accommodate standard sofa shapes, such as 1-seater, 2-seater, and 3-seater models, unique configurations require special attention.
For L-shape or sectional sofas, it’s best to select custom-fit slipcovers tailored to these specific designs. Our L-shape collection offers slipcovers engineered to provide a seamless fit, ensuring that every curve and corner is covered.
This approach guarantees a smooth, tailored look and optimal protection, regardless of your sofa’s silhouette.
Q3. What cushion fill works best for old sofas?
The ideal cushion fill for rejuvenating old sofas combines durability and comfort. High-resilience foam cores offer long-lasting support, preventing sagging and maintaining the sofa’s shape over time.
When wrapped in a down alternative layer, these cushions deliver a plush, inviting softness without losing structure. For best results, periodically rotate and flip your cushions for old sofa to promote even wear and maintain a consistently comfortable seating experience.
Q4. Is home dyeing safe for synthetic blends?
Dyeing at home can be effective, but the type of dye matters. Fiber-reactive dyes are most successful on natural fibers like cotton or linen.
- For synthetic blends-such as polyester or poly-cotton-choose pigment dyes specifically formulated for synthetics to achieve vibrant, lasting results.
Always test your chosen dye on a hidden swatch of fabric first to check for colorfastness and compatibility, ensuring your sofa fabric refresh is both safe and visually appealing.
Q5. How do I maintain button tufting?
Button tufting adds timeless elegance to any sofa, but it requires gentle care to stay intact. Regularly fluff the fabric around each button to prevent flattening and keep the tufting looking full. Once a year, inspect the tufted areas for any loose threads or buttons.
If you spot any, carefully tighten them using a needle and matching thread to reinforce the stitches. This simple maintenance routine preserves both the beauty and structural integrity of your tufted sofa.
Conclusion
Revitalizing your sofa need not be a costly endeavor. By combining effective DIY sofa cleaning methods, strategic use of sofa slipcovers and trend-right cushions for old sofa frames, you achieve a remarkable sofa fabric refresh. Duroflex’s extensive lineup,from versatile 1-seater sofa options to spacious L-shape sofa collections, integrates seamlessly with your makeover plan. With structured maintenance and creative styling, your refreshed sofa will look and feel like new. Embrace these steps, and enjoy a revitalized living space without the expense of a full replacement.